
Enabling SSO with SAML
You’re security conscious - we love that! With SAML, (Security Assertion Markup Language, for the uninitiated) you can ensure that all of your employees are able to securely authenticate their details when logging into Signable - no muss, no fuss!
In short, SAML will allow you to enable SSO (Single Sign On), meaning that your colleagues will only need one set of credentials to access all of your tools, including Signable.
Prerequisites:
One thing we won’t be covering in this article is how to configure and set up your own SAML identity provider (Like Okta, Entra, Workspace, etc). In order for this to set up relatively seamlessly, you’ll need to have created and configured your SAML identity provider of choice.
Now how do we turn it on in Signable? Glad you asked.
Step 1: Company Settings
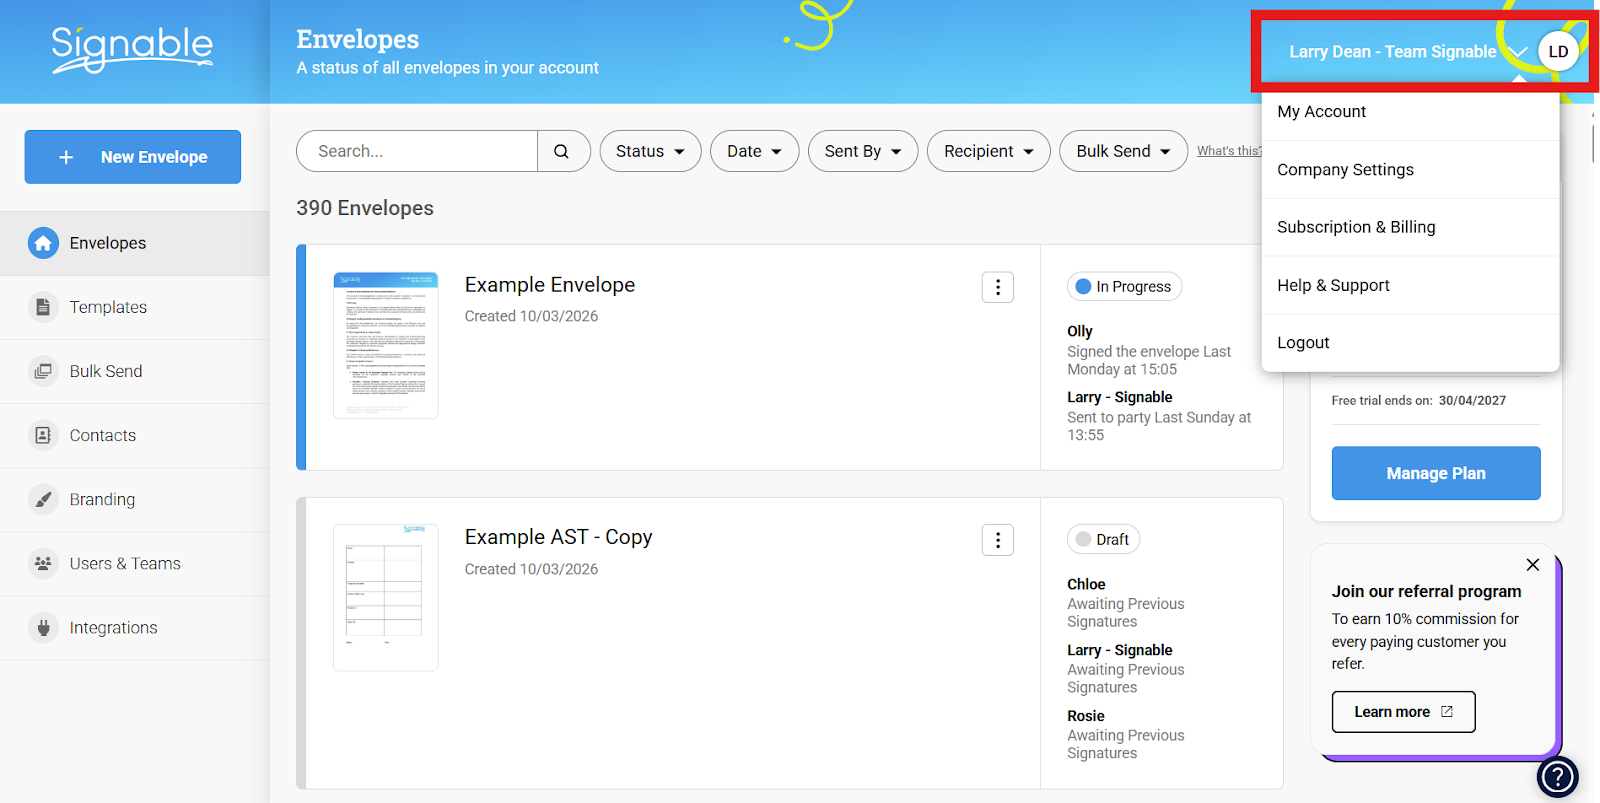
First, a Super Admin user will log in and navigate to Company Settings, (found by clicking your name towards the top right):
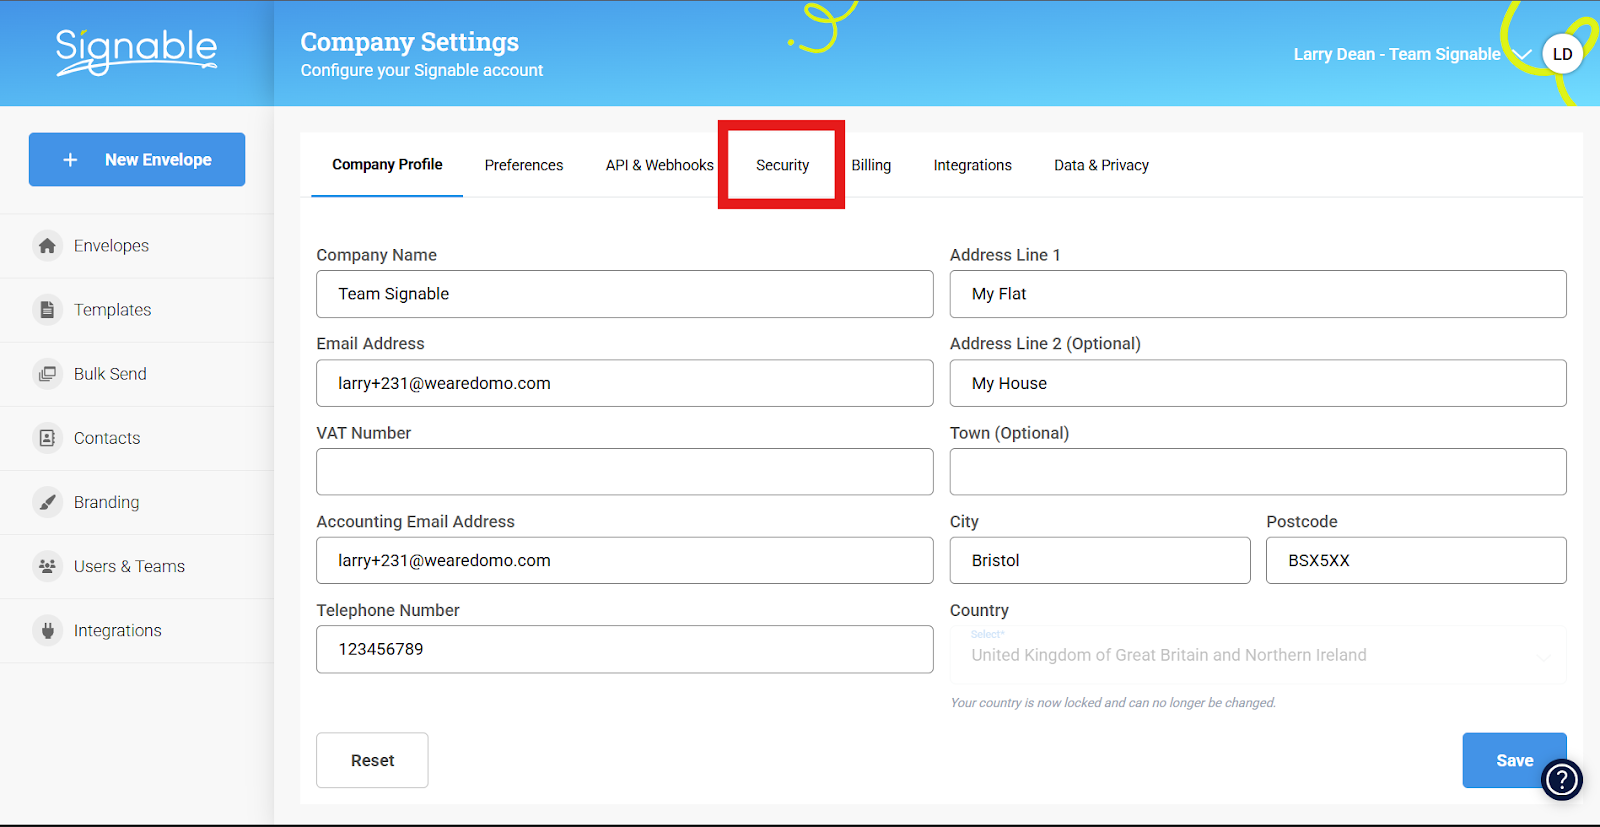
Then, selecting the security tab like so:
Step 2: Enabling SAML SSO
Now that we’re where we need to be, look to the bottom of the Security page to see two toggles and button labelled ‘Configure’
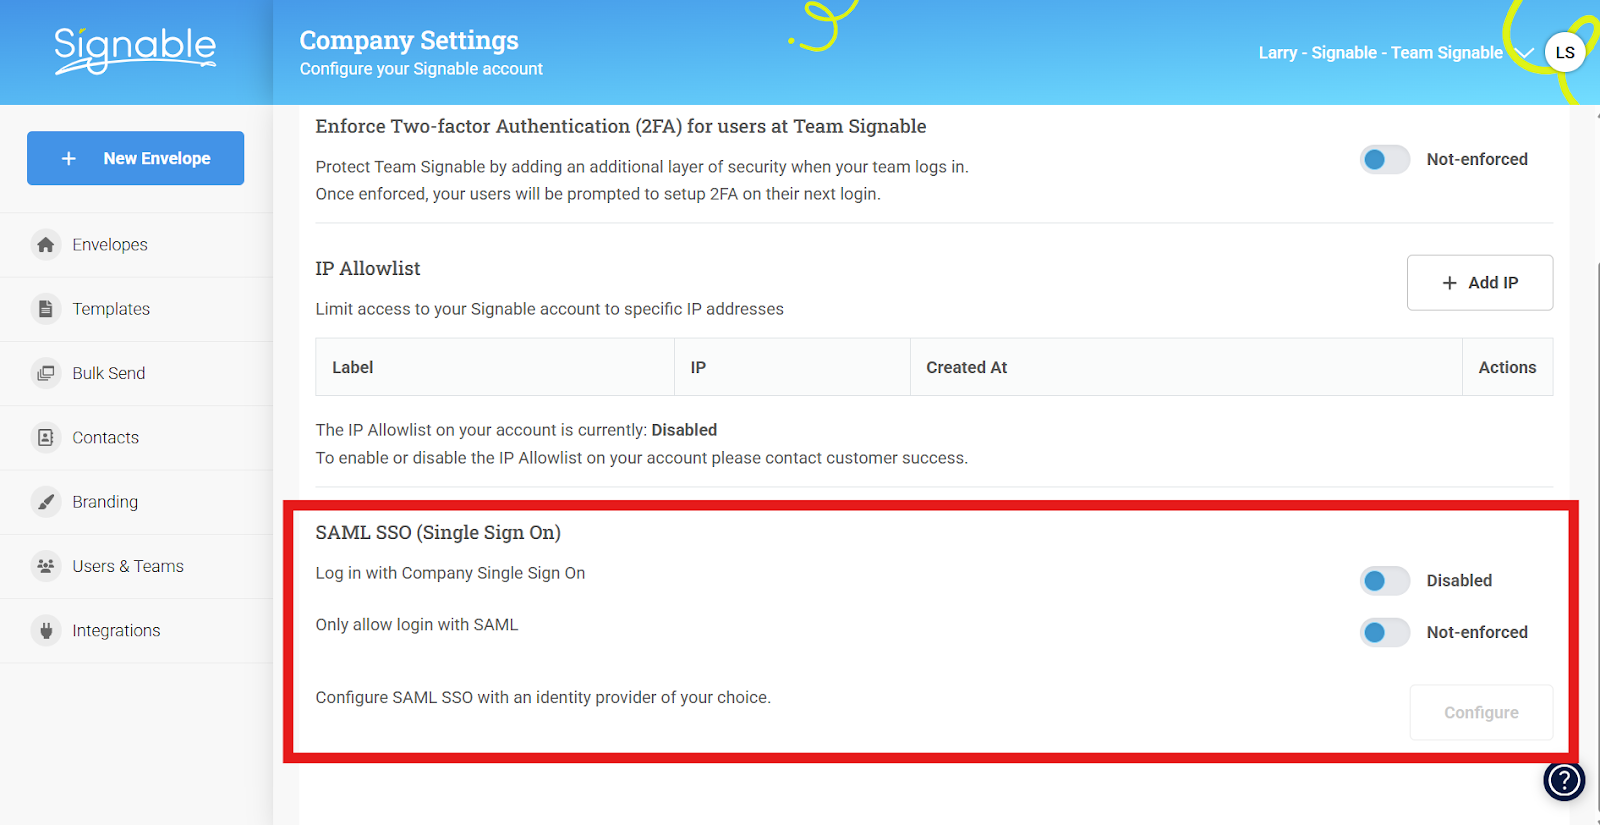
From top to bottom, we have the following;
Log in with Company Single Sign On:
When enabled, this will allow users to login via SAML in addition to the more traditional Signable password & email combination. SAML will divert to your identity provider of choice (think Google Workspace, Okta, Microsoft Entra, etc) and your colleagues will complete their login journey there before being plonked back onto Signable.
Only allow login with SAML:
If enabled, this will remove the ability for Signable users to log into your account with the email & password combination, meaning they will have to log in via your SAML identity provider as mentioned above.
It's worth noting that a Super Admin will always have the option to log in with their email and password combination even if SAML is enforced on an account level, this is to ensure that there's no risk of you being locked out of your Signable account if there is an issue with your SAML SSO identity provider's platform!
Configure:
This button will only be accessible upon enabling ‘Log in with Company Single Sign On’ from here, you’ll be asked to enter the details specific to your identity provider, in essence - to link Signable to the identity provider themselves. You’ll see a pop-up like this:

Step 3: Configuring your SAML SSO with Signable
The top three headings; Single Sign On URL, IDP Single Logout URL, IDP Identity ID and X.509 Certificate are to be provided by your identity provider.
Please note: IDP Single Logout URL will be used to enable 'Single Logout'. This means that whenever you log out of your identity provider - you'll also be logged out of Signable! This is optional so please disregard it if you're not planning to implement single logout.
The ‘Default Role’ dropdown dictates the access level that users added via SAML will have - for a reminder on user roles, click here.
The next three - SP Entity ID, Assertion consumer service (ACS) and SP Single Logout URL are details that you’ll need to copy from Signable and paste within your identity provider’s platform.
The final one is SP Certificate, this can be entered onto your identity provider's platform if required, however isn't strictly necessary.
With these details to hand, you’ll need to do the following (the order may vary depending on your provider):
1. (On your ID Provider) First, add Signable as a recognised app within your identity provider of choice, how exactly to do this will vary from app to app, so check the relevant documentation.
2. (From Signable to your ID Provider) - copy the SP Entity ID and Assertion consumer service (ACS) addresses and paste them into your app configuration within your identity provider,
-
SP Entity ID may appear as something as simple as ‘Identifier’ or ‘Audience URL’
- SP Single Logout URL may appear under your identifier's configuration page as something like 'Logout URL'
- Assertion consumer service is essentially our Single Sign On URL that we’re trading with the identity provider - so it could appear as ‘Single Sign On URL’ when adding us as an app.
3. (From your ID Provider to Signable) You’ll need to find the corresponding values for the identity provider’s Single Sign On URL, IDP Identity ID and the X.509 Certificate, copy them from your identity provider’s system and paste them into the corresponding field in Signable.
- Single Sign On URL - Again, the name varies but this will correspond with something like ‘User Access URL’ within your identity provider’s configuration settings
Entra Note:
If utilising Microsoft Entra, you will find this value listed under 'User Access URL' within the properties page, not during the SAML configuration steps.
Due to the way the values are presented during the Entra configuration, it could be misconstrued - if you encounter any issues upon completed set-up, don't hesitate to contact us at help@signable.com.
-
IDP Single Logout URL - Look for something labelled 'Logout URL' on your identity provider, then paste it into Signable.
- IDP Identity ID - This will either be labelled Identity ID or something like ‘Identifier’, ‘Issuer’, etc. Once found - paste this into the corresponding field within Signable.
- X.509 Certificate - If not labelled as above, this may be called something like ‘Signing Certificate’, copy this and paste it into the corresponding field within Signable.
With all that done, it should look something like this(in my example, we’re using Microsoft Entra):

4. (Within your ID Provider) Once these details are swapped over - the next part is to map the different user attributes to the Expression/Claim it relates to. Each Signable user consists of a name & an email so you will need an attribute expression for ‘name’ and an attribute expression for ‘email’
It’ll look a little something like this (in this example, we’re using Okta):
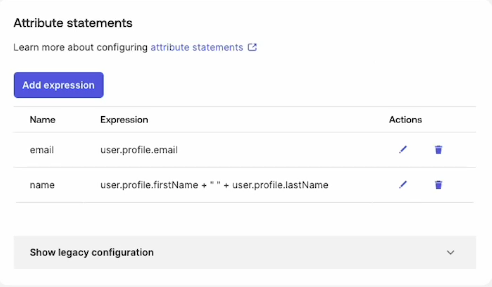
It's worth reiterating that this step of assigning the user attribute is crucial, the formatting of each user expression may differ slightly from platform to platform but it's important that the attributes themselves are labelled 'email' and 'name' only, with no additions!
Now the email address and name for the Signable user will align with the user profile’s email address and full name within the identity provider.
5. (Within your ID Provider) Finally, you’ll need to assign the users within your identity provider to your new Signable application created within the identity provider’s dashboard (as referenced in Step 1).
Click save, breathe out - you’re done! You’ve now successfully configured Signable with SAML SSO!